
Shopping from the USA or Australia?
Choose your local store
SHOP BY REGION

Premium Customizable Rug Tufting Starter Kit – Complete Studio Set

Shipping calculated at checkout.

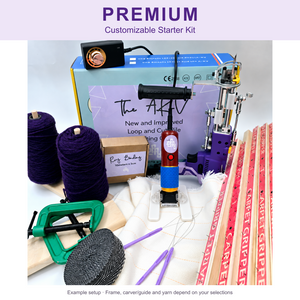
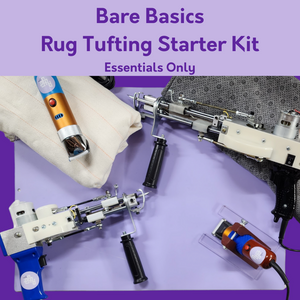
Make your own rugs with a complete studio setup: the purple AK-V, tufting and backing materials, five scissors, and the hand tools for preparing, shaping and caring for your work. Choose your frame, carver and yarn, then start with a guide built around your kit.

Open your Premium getting-started guide →

What’s inside

A complete studio setup. Made your way.

The Premium core includes materials and hand tools for more of the finishing process. A frame, electric carver, compatible guide and yarn bundle are included only when you select those options.

Explore the included equipment below, then choose the extras for your setup.

Purple AK-V tufting gun

01 / 06 · Purple AK-V tufting gun · Included in the core kit

Your powered needle draws with yarn, one line at a time. The AK-V has adjustable speed, an LED needle light and a brushless motor.

Start with cut pile and learn the gun’s movement before trying the manual loop-pile conversion. The companion guide links to the model lessons.

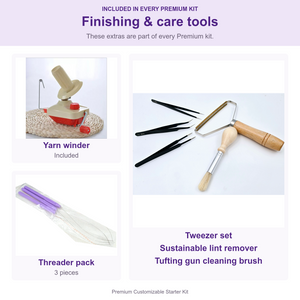
View the full included-item checklist
  • AK-V cut-pile tufting machine
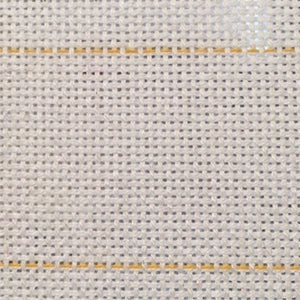
  • Primary tufting cloth
  • Non-slip backing cloth
  • Grey-tone rug binding
  • Yarn winder
  • Sustainable lint remover
  • Curved-tip scissors
  • Bent-tip scissors
  • 8-inch fabric scissors
  • Small and large duckbill scissors
  • Tweezer set
  • Tufting gun cleaning brush
  • Three-piece threader pack

Make it yours

Choose the setup for your studio.

The core tools are included. Your frame, powered carver, compatible guide and yarn depend on the options you select.

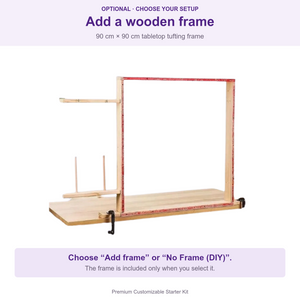
Optional 90 cm wooden frame

01 / Your space

Choose your frame.

Wooden · a setup that stays ready.
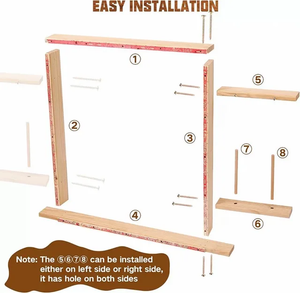
The 90 cm tabletop frame holds your cloth firmly while you work. It needs a stable surface and secure clamps.

Already have a frame?
Choose No Frame and use a suitable existing or DIY setup. Measure the usable working area before planning your rug.

Aluminium is also offered in Canada.
It is easier to dismantle and reassemble. Choose the frame offered in your shop that suits your workspace.

Choose your frame ↑
Optional Premium yarn bundles

02 / Your colours

Choose your yarn.

Matte acrylic · structure for shaping.
Use two strands and follow the acrylic beginner lesson.

Cotton Blend · colour and value.
Use one strand and follow the Cotton Blend lesson for spacing and pressure. Estimate the quantity of each colour for your design.

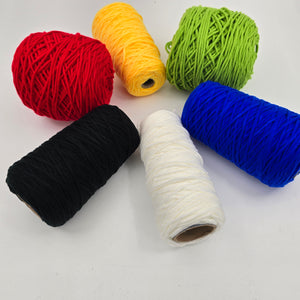
Choose six 200 g Cotton Blend cones, twelve 250 g matte acrylic cones (six colours, two of each), or No Yarn Bundle.

Open the matching beginner yarn lessons →

Choose your yarn ↑

03 / Your finishing tools

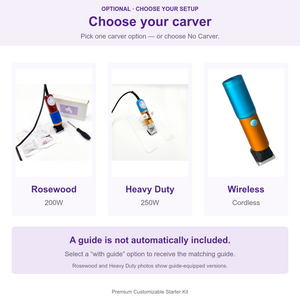
Choose how you want to carve.

Rosewood, Heavy Duty or Wireless.
Choose from the carver options recorded for your shop, or choose No Carver.

A compatible guide is added only with the option that specifically includes it. The guide lessons follow the equipment you actually selected.

See the finishing lessons for your tools →

Choose your carver ↑

Rosewood

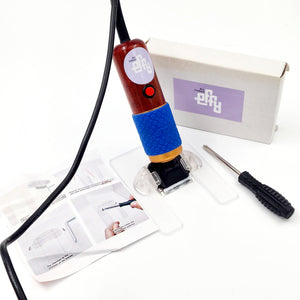
Choose shears alone or Rosewood + Easy Clip. The guide is included with the Easy Clip option.

Heavy Duty

Choose the machine alone or Heavy Duty + Guide. Use the matching guide for this model.

Wireless

Choose the cordless carver alone or Wireless + Easy Clip. No Carver is available too.

Before you start

Have these ready for your first rug.

Primary cloth, non-slip backing and binding are included. Arrange the adhesives for your chosen finish, and fill any gaps left by your selected options.

Secure the yarn.

Use a purpose-made latex rug adhesive to secure the yarn in the tufting cloth. Follow its curing and ventilation instructions.

Read the sealing lesson →

Check your selections.

  • Purpose-made rug latex/adhesive to secure the yarn
  • Suitable adhesives for your backing and binding method
  • Yarn if you select No Yarn Bundle
  • A suitable existing or DIY frame if you select No Frame

Beginners in EFFY workshops

See beginners make their first rugs.

A circular logo, a striped rug and a character brought to life. See the process and finished results. Some workshop clips show earlier tools; follow the model instructions for the equipment in your own kit.

From drawing to finished rug.

Follow a circular logo from tracing onto the cloth through tufting, carving and the finished reveal.

Video: @badink_design

Workshop process · 1:10 · @badink_design

A beginner’s first striped rug.

See a beginner build up blue stripes, shape the surface and finish the edges before revealing the rug.

First-rug workshop process · 56 seconds · EFFY workshop

A character brought to life.

A quick look at tufting a yellow character, followed by the proud moment of holding up the finished rug.

Short workshop highlights · 14 seconds · EFFY workshop

The lessons are ready when you are

You do not have to learn it all today.

The Premium companion guide covers the first-rug foundations, then expands into your selected frame and carver, the included hand tools, backing and binding.

Open a stage to go straight to the lesson, or start with the kit check and work through the full guide.

Open your Premium getting-started guide

Your idea · Your colours

Plan your first rug.

Start with your own simple design. Measure the usable area inside your frame, choose a comfortable first-rug size, and plan your EFFY Cotton Blend colours before you begin.

Fit the working area.

For an EFFY 90 × 90 cm frame, start with the recommended 80 × 80 cm design space. Measure your own usable area and allow room for practice and finishing edges.

Plan your yarn.

For EFFY Cotton Blend, plan how much of each colour your design may need. Check the amount of each colour in your order; a Cotton Blend bundle is an optional kit choice.

Make a practice sample.

Treat yarn quantities as estimates. Your pile height, line spacing and tufting density affect how much yarn you use.

Makers at work

See the AK-V in their hands.

Watch makers use the AK-V included in your kit to create their own designs. These clips show the earlier blue AK-V; creator credits are linked with each demonstration.

Tufting the design. Revealing the finished rug.

Watch @artsymadwoman tuft a floral design with the AK-V, then see the finished rug from the front, with its fluffy cut-pile surface and carved detail.

These selected moments show the tufting and the finished result from the same project.

AK-V tufting + finished front · 18 seconds · Selected project moments · @artsymadwoman

Outline, then fill the shapes.

Watch the AK-V follow a character design and build up areas of colour, ending with a view of the stitched back of the rug.

Video: @dekurugs

AK-V outlines and filling · Stitched back shown · 42 seconds · @dekurugs

Follow a lettering design.

See lettering transferred onto the cloth, then the AK-V working along the drawn design.

Video: @milky_moon__

Lettering with the AK-V · 23 seconds · Silent · @milky_moon__

Before your first rug

What to know before you start.

Is this the same kit as the Ultimate?

They share the AK-V and first-rug foundations, but the Premium has its own finishing-tool collection and more choices of carver. Use the inclusion list and your selected options on this page rather than assuming the contents of another kit.

Can I start without an electric carver?

Yes, No Carver is a selectable option. The Premium includes hand scissors and finishing tools. Work slowly, practise with the tools you have and use only the relevant carving lessons in your companion guide.

What will I need to buy separately?

Adhesives are separate. Arrange yarn and a suitable frame if you choose the options without them. Check your order before starting, including the materials needed for your chosen backing and binding method.

Is this for a complete beginner?

Yes. Begin with a small design and a practice area. The separate Premium getting-started guide takes you through your kit check, design, frame, cloth, threading, tufting and finishing.

What kind of workspace do I need?

A sturdy work surface where the frame can be securely clamped. Leave room to work comfortably and check both sides of your rug. Allow a separate area for trimming and finishing, and follow your adhesive’s ventilation instructions.

Can I make cut pile and loop pile?

The AK-V arrives set for cut pile. It can also make loop pile through manual conversion. Start with cut pile while you learn, then follow the model-specific conversion instructions linked from your guide.