Search

Search

About our shop

Shipping destinations:

Canada and the USA

Shipping times:

Please see our shipping policy for shipping times to your region. We ship primarly by UPS.

Shipping Policy

Shipping cost:

All orders will be charged for shipping unless you choose pickup in Vancouver. Full prices are displayed at checkout. To arrange a pickup please email me at hello@allthingseffy.ca

Please see our shipping policy for more information about shipping! Shipping Policy

NO ORDER CANCELATIONS

You can select your preferred payment method at checkout.

We accept secure payments for both local & international customers via Credit Cards, Debit Cards & PayPal.

AFTERPAY AVAILABLE FOR CANADIANS

DURING BLACK FRIDAY BLOWOUT - NO REFUNDS, EXCHANGES, OR RETURNS

YOU MAY STILL CONTACT US IF YOU FEEL SOMETHING IS DAMAGED OR DEFECTIVE

Your satisfaction is important to us. We offer a conditional 30-day Return & Exchange Policy:

If a product is damaged or faulty upon delivery, we offer a 100% refund once the item is returned to us.

Please note some items may not be returned if they are clearance or outlined in the following returns refund policy.

Timing:the 30-days Return & Exchange Policy starts the day item was received. To be eligible for a return, goods must be unopened, unused, undamaged and accompanied by proof of purchase. For returns, please email hello@allthingseffy.cawith the subject 'Returns' and include your order number, name and the reason why you want to return the item. Seller will provide the customer with instructions where to send returned goods. Customers are strongly recommended to get proof of postage when returning goods to avoid "lost packages" situations. Please note that customers are responsible for shipping costs of returned items. When returned item is received and inspected, customer receives a confirmation email, notifying about the status of the refund. If the refund is approved, then it will be processed and a credit will automatically be applied to customer's credit card or original payment method shortly after.

Simply add as many items as you wish to your shopping cart while browsing our store. Once you want to proceed with the order - do so by going to the cart and clicking "checkout". Follow the instructions by providing us with delivery information and select payment method the for goods - we will ship your package within 1-3 business days.

Please consider your purchase carefully as we do not accept order cancellations.

If your order is flagged as fraudulent, we have to have the order cleared by our insurance which can delay your order up to 2 business days. This primarily happens when orders are placed with a credit card.

We are always happy to guide you at any step! Just reach out!

International taxes might be applied depending on your country's taxes policy.

Customs duty is calculated as a percentage of the customs value of the goods:

The percentage or rate varies depending on the type of goods. You can check the tariff applicable in the TARIC database for EU and Import calculator for USA.

For the USA orders over $800 USD may incur duties and tax

The customs value is made up of the price paid for the goods, the insurance cost, and the shipping cost.

Your order is shipped directly from our manufacturer rather than our warehouse in Vancouver.

Canadians please remember you will pay duites and tax on these orders but we will try to keep these as minimal as possible.


You still get our 6 Month Warranty on AK-V's, AK-I's, AK-IIs and AK Duos and for all machines you get customer support, product guidance, returns, refunds and exchanges in the exact same way as if you purchased direct from us.

Factory direct shipping can take up to 14 business days, but is usually around 7 business days.

We will relay your tracking number within a week of your order. Usually your parcel will be well on route before we relay the tracking. This is just because this process is manual rather than automated.

We offer a 6 month warranty on all brand new AK-Vs, AK-Is, AK-II's, and AK Duos.

This means if you have a failure with your machine in the first 6 months that is not attributed to user error then we will repair your machine for free and if we can't, we will replace it entirely.

*please note we are highly experienced with these machines which means we can tell which mechanical and electrical faults occur because of human error - such as dropping the machine, banging it on the frame, incorrect adjustments, incorrect storage, incorrect maintenance.

However, just because something happens out of human error that doesn't mean we disappear and leave you to sort it out yourself! We offer servicing and repairs of these machines at very reasonable prices.

We also offer tutorials to help you learn to adjust your machine correctly and also how to repair your machine correctly.

Lastly we try to keep all spare part for these machines in stock!

You can learn more about our warranty processhere.

All Things EFFY was established in 2018 and has gone through several re-brands in that time because of the evolution of the business and the products we sell.

We were one of the first stores in the world to start selling tufting equipment and supplies back in 2019. We really pride ourselves on our knowlege and passion for the craft.

While there are many people involved in making EFFY run smoothly the principle owner and operator is Carolyn. She runs all the social accounts, customer service, importing of goods, and website updates and maintenance. Carolyn also test all the equipment and is continuously searching for the best products available for rug tufting and punch needling. She's been responsible for discovering several products being used for rug tufting and are now sold worldwide such as the long pile duo, rosewood carver (altough we must also thank myra and jean for her inspiration to sell this product) and the first rosewood carving guide developed with EFFY's builder/ woodworker.

EFFY is a family run business primarily located in Christchurch New Zealand. In 2023 we expanded to Vancouver Canada, Carolyn's hometown. In 2024 we expanded to Sydney Australia. We are thrilled to be able to offer more affordable shipping in Canada, the USA, and Australia in comparison to when we shipped only from New Zealand.

We have had several part-time workers help us throughout the years but as of June 2023 the business is almost completely run by just Carolyn. She does her absolute best to introduce you to her favorite crafts in the most enjoyable way possible.

Carolyn thanks her friends, family, and husband for their support and passion for EFFY. It takes a village of support to keep EFFY running as smoothly as possible!

Carolyn also thanks her amazing and brilliant customers. YOU are what makes EFFY. Without your patience, support, kind words, loyalty, and orders All Things EFFY would not be one of the leading suppliers of tufting supplies in the world. It's truly incredible!

If you want to know more about All Things EFFY, just ask.

What is rug tufting?

Rug Tufting is a brilliant shiny world of creating your own rugs at home using manual tool or electronic handheld Tufting Guns.

Why have Tufting Guns specifically become so wildly popular? In my opinion it is because it is something almost anyone can do and it provides instant gratification. Within 15 minutes you can see your design take shape and you can make your own wee rugs in a couple of hours. Brilliant eh?

Within Tufting Guns, Punch Needles, and Speed Tufting tools you are not limited to just making rugs, you can make pillows, wall hanging & wall art, stool covers, chair covers....just thing of any surface you can attach a fluffy tufted piece to...the sky is the limit. 

You don't need to be an artist to get into rug tufting. Just pick a design from something you like or one of our available patters, trace it to the fabric and "paint by numbers with yarn". Just keep in mind copyright laws and respect other artists original works!

Rug Tufting is used to produce a hand-tufted rug. 

Fabric is stretched on a frame, a design is applied and a tufting gun is used to shoot yarn through the fabric while passing either horizontally or vertically. 

As you move the gun it leaves a yarn loop (or cut loop) at the back and a stitch on the front for every cycle of the gun. These cycles happen quickly approximately 5-40 stitches per second depending on the Tufting Gun you are using.

Here is what you 100% Need:

Foundation Fabric specifically designed for Rug Tufting that can withstand the force of the gun.

A Tufting Frame to stretch your fabric on.

Your cloth should be tight as a drum.

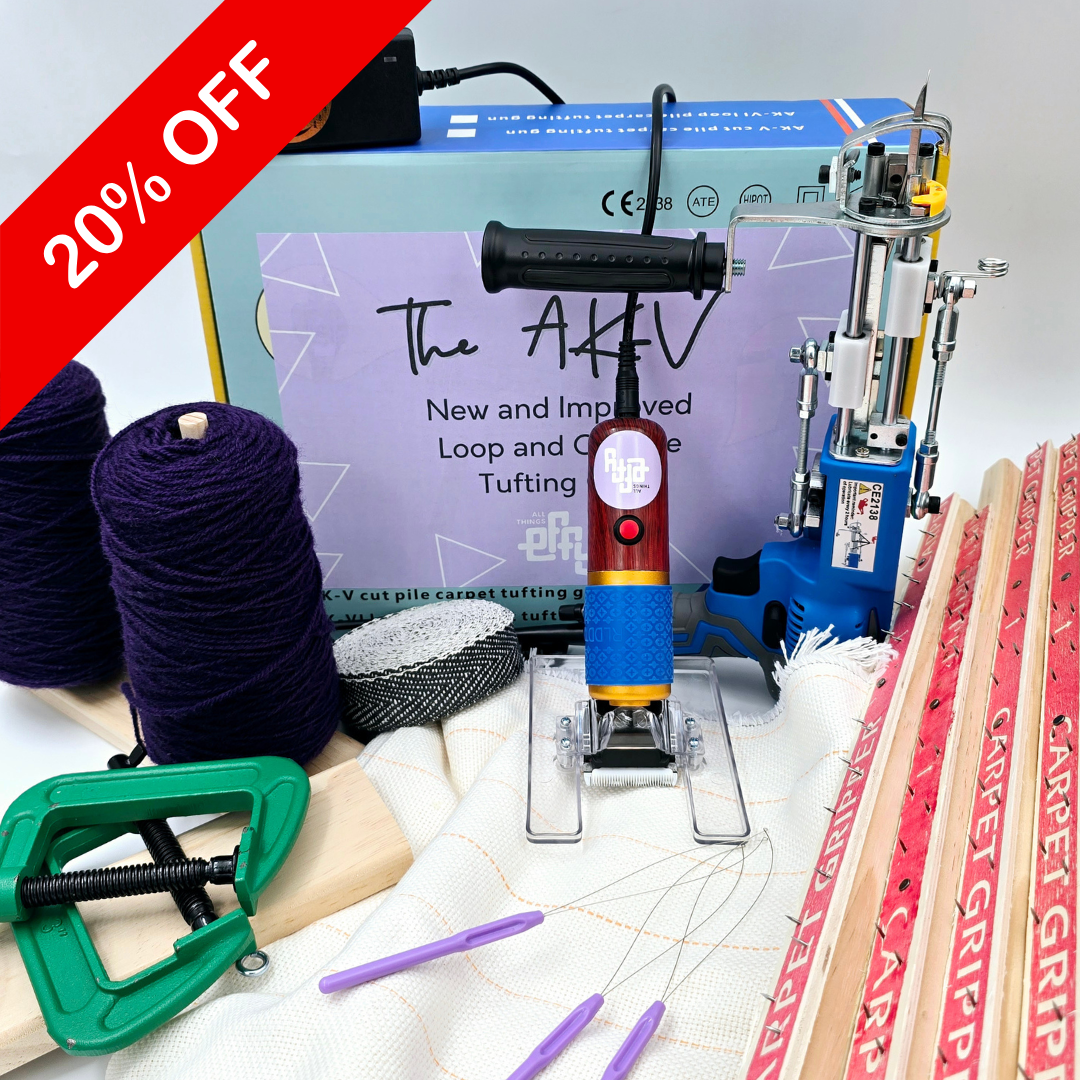
A Tufting Gun or/and a Punch Needle or/and a Manual Speed Tufting Tool.

Yarn

A Design

Latex Adhesive (to seal the back of your rug)

A Secondary Backing to make the back of your rug more aesthetically pleasing.

Spray Adhesive to apply the secondary backing

Fabric Glue to attach your rug binding

Rug Binding

Some optional but very handy tools are:

Curved scissors for trimming

A Rug Carver for evening out your rug

Rug Yarn - For a durable, lasting rug

Cut pile:

Cut pile guns have scissors that cut off the yarn/wool after the needle on the gun has punched the yarn/wool through the cloth, resulting in hundreds of single tufts. The finished rug has a cut finish that is soft and fluffy. The cut pile threads have a higher pile (height) than the loop pile threads. The cut pile rug can be further shaped with either scissors or a rug carver.

Loop pile:

Loop pile tufting guns create little loops with a continuous thread. The pile (height) of the loops are half the height of the cut pile tufts. The finished rug is soft and very durable but not as fluffy as a cut pile.

Consider mixing the two textures!

How do I make a real rug?

Make a square timber frame

It is best made out of timber and screwed together for stability.

It needs to have feet either side at the bottom for clamping to the table.

Make sure the frame is slightly larger than the finished work to allow for finishing off the edges (and also so you don't scratch your hands on the carpet tack or gripper strips on the edge of the frame)

More than one rug can be made on the one larger frame.

The frame requires the addition of carpet edging strips around the whole frame to secure the cloth.

The little nails need to point outwards.

You can also use gripper strips that hold your cloth in place beautifully! 

An eyelet needs to be secured above the tufting gun for the yarn/wool to thread through - this ensures the yarn flows properly through the gun.

I sell everything you need in my Ultimate Rug Tufting Starter Pack

Alternative I sell the frames separately.

Two different cloths are required:

The primary cloth:

This cloth is attached directly to the frame.

It needs to be strong enough to withstand the pressure of the tufting gun. This means it need to be either 60% polyester or 100% polyester.

ThePrimary Tufting Cloth I sell is perfect for all tufting machines! It also has yellow guidelines, especially helpful when stretching the cloth over the frame to keep it horizontal.


The secondary backing cloth:

This cloth is also known as the backing.

It is applied to the back of the finished work after sealing the rug with glue.

It is specifically chosen to be soft  and durable for foot traffic.

For the most professional finish use the cotton and polyester mix backing Backing cloth I sell with rug binding.

There are two different ways most people use

1.  Drawing directly onto the back of the cloth with a marker pen (I prefer starting with a water-soluble marker!), either making it up as you go or copying a drawing you have designed yourself.

2.  The second way is to project the design onto the back and trace around with a marker pen.

3. Print the design out on paper and tack it to the back of the cloth and trace the pattern by putting a bright light behind the paper/fabric.

N.B. If you have writing in your design remember to have it as a mirror image on the back so it reads the right way on the front.

Also we would like to remind you to respect copyright  and if you are using some one else's design that you have permission to do so.

For a beginner I also suggest that you make the design simpler for your first few pieces until you get the experience to tackle more complex designs.

Getting this right is important

Cut the cloth 3 or 4 inches (10cms) larger all around.

Using the yellow guidelines on the Monks Cloth level the lines up with the top of the frame and hook into place on the carpet tack strips or gripper strips.

Pull the cloth firmly to the bottom and then work around the sides.

It needs to be tight like a drum skin to withstand the pressure of the tufting gun.

Test by tapping the cloth with your finger. If it needs to be tighter make adjustments by unhooking the cloth, pulling hard and hooking back in place.

During the tufting process as you use the gun it may become a bit loose. Just unhook sections, pull firmly and hook back into place, making sure to keep it level. If you are using gripper strips you don't have to re-stretch you cloth while tufting!

A firm cloth helps to avoid other issues when tufting.

Firstly make sure the yarn/wool is flowing freely, either on a cone, or cake on a spinning yarn holder. Make sure the cord of the tufting gun is out of the way and it is turned off!

The yarn/wool goes through the eyelet at the top of your frame, so the yarn is fed to the tufting gun from above.

It then goes through the eyelet on the gun (the small wire spring that sits up from the gun) from the handle side.

Finally the yarn/wool is thread through the needle, this is the trickiest part and is best accomplished with a needle threader or piece of wire like a paper clip.

Remember to pull out about 2 inches (5cm) of yarn to hang down before starting to tuft.

Now you can turn the gun on!

Getting started

Punch the needle in the cloth *firmly* before pulling the trigger.

Always move upwards toward the closed side of the needle tip with the gun at a 90 degrees angle to the cloth.

You can make a horizontal by turning the gun horizontal.

When making curves rotate the gun with the curve and do the curve slowly in spurts - this give you more control

Again always push firmly into the fabric. This is no time to be delicate. If your setup is correct then your cloth can handle this pressure.

If the cloth becomes loose, stop and stretch the cloth.

What width do I leave between rows?

There is no hard and fast rule here. You may like to do a few practice runs, stop and go and check the front to see if it is how you would like it. (Ideally, no cloth should be showing.)It is generally recommended to have the rows as close as possible, but without them overlapping.

If the gap between the rows is too wide when you check the front you will be able to see the cloth. If this happens you can simply put a row in between.

If you have overlapped the rows or they are too close, when you check the front it may look matted. In this case you can pull out any extra (if it is cut pile). If loop pile you can cut the loops with scissors and pull any you don't want out.

Punch the needle in the cloth *firmly* before pulling the trigger.

Always move upwards toward the closed side of the needle tip with the gun at a 90 degrees angle to the cloth.

You can make a horizontal by turning the gun horizontal.

When making curves rotate the gun with the curve and do the curve slowly in spurts - this give you more control.

Again always push firmly into the fabric. This is no time to be delicate. If your setup is correct then your cloth can handle this pressure.

If the cloth becomes loose, stop and stretch the cloth.

What width do I leave between rows?

There is no hard and fast rule here. You may like to do a few practice runs, stop and go and check the front to see if it is how you would like it. (Ideally, no cloth should be showing.) It is generally recommended to have the rows as close as possible, but without them overlapping.

If the gap between the rows is too wide when you check the front you will be able to see the cloth. If this happens you can simply put a row in between.

If you have overlapped the rows or they are too close, when you check the front it may look matted. In this case, you can pull out any extra (if it is cut pile). If loop pile you can cut the loops with scissors and pull any you don't want out.
When you have finished the tufting with the machine, all the threads need to be attended to. This is best done while on the frame.

Pull out any dangling threads. The idea is to get the back as flat as possible, without any lumps. clumps or hanging threads, ready for sealing. 

This is also the opportunity to have a good go over of the front and pull out any dangling threads there too.

On the front side, using a small pair of scissors, part the joining of colors and remove any over lapping color threads with a pair of tweezers to make your lines nice and sharp.

When you have tidied up both sides it is time for sealing the back.

This is best done while still on the frame, after pulling out any unwanted tufts. Once the seal has been applied it will be difficult to then remove any unwanted tufts.

What glue you use to seal the rug is important. You want the dried glue to be firm enough to hold all the yarn/wool in place yet flexible enough for the finished rug not to be stiff.

We have through trial and error found a Carpet Latex Adhesive that works well for rugs.

Apply the adhesive generously to the back, working from the top in sections. With a scraper work the adhesive into every row, covering all of the yarn/wool. Make sure the edges are all covered too.

Leave this to dry. Leaving it on the frame helps the air to circulate around for drying.

Once dry it can be removed from the frame and any clipping or rug carving can be done on a flat table top to finish off the front, before applying the backing cloth.

Rug carving is finishing off the front side of a cut pile tufted rug either manually with scissors or using an electric carver. 

It can help define lines by angling a cut into the edges of the colors.

It can create a more 3D piece of art work, by carving in designs.

It can also be used as a general carving across the whole rug to form an even pile.

Tufted rugs are art pieces and therefore lend themselves to a creative approach with carving. You as the artist can make the call on whether you want to carve the piece or not.

We sell a wide variety of carving tools for you to choose from.

When you have sealed your rug with adhesive and it has dried. When you have finished off the front of your rug, carving and evening the pile, then it is time to add the secondary cloth, the backing!

Before starting to apply the backing, cut the edges of the Cloth about 1 inch (3cms) from the edge of the yarn/wool, evenly all the way around. 

1.  Lay the secondary cloth over the rug and cut it out to fit just inside the edge of the yarn/wool.

Apply special spray adhesive on both the backing and the dried back of the rug. Place the backing neatly in place over the back of the rug and press down firmly.

This adhesive has been tried and tested by us and is the best on the market for this purpose.

2.  Next the edges of the Cloth need to be folded over and glued into place. Before gluing cut out a triangle from each corner so when you turn it over it sits nicely in place. Using the spray adhesive pull the monks cloth so the edge of the yarn/wool is the border. You can use the spray adhesive for this.

3. Finally the professional rug binding is glued on to completely finish the project. Before gluing lay out the binding on the edge to cover the turned over monks cloth and backing cloth. Cut the corners so that they lay flat and securely edge to edge. Using a fabric glue glue on the binding.

Viola! Your rug is completed.

If you would like to hang up your rug as a piece of art, rather than have it on the floor as a rug you need to finish off the rug slightly different.

Completely seal the back of the rug with glue and finish off the front with carving as desired. 

For a wall hanging the next step is to turn over the cloth and glue to the back of your rug, cutting out the corners so it lays flat or folding them nicely before gluing.

A wall hanging can be attached to a wooden backing, that has been cut just a little smaller than the rug, with tiny nails or staples hammered in from the right side into the backing. Screws can then be screwed into the back at the top for hanging.

Depending on the wall hanging, instead of applying a wood backing to completely cover the back, a piece of wood or doweling can be attached at the top, that has string attached to it to hang on the wall.

Finish the rug to sealing the back with adhesive and the front carving as desired the same as for a rug. But when you cut the edge of the Tufting Cloth allow more, about 2 inches (5cms). This is so you have more to work with when sewing the cushion/pillow.

Tufting Cloth frays really easily so over locking around the edge would be helpful.

Prepare the backing material, this is not the same material as the backing for a floor rug. It can be a stronger thick cotton piece of fabric. Cut the fabric to the same size as the rug (including the Tufting Cloth edges) and lay both right sides together. The front finished tufted side is facing into the middle.

With a sewing machine, using a zipper foot so you can get as close as possible to the edge of the tufted yarn/wool sew around 1/3 of the opening side, around three sides then 1/3 back on the opening side (do not sew the last third as it creates the opening to turn it right side out).. 

Turn the pillow case right side out, stuff with filling and then hand sew the 1/3 opening together and you have a finished cushion/pillow!

Frequent problems

There are several reasons why this may happen:

You are not using cloth that can withstand the force of the gun. We recommend sticking with the cloth we sell here that is 70% Polyester and 30% Cotton.

It is also possible your cloth is not stretched tight enough! Make sure your cloth is stretched tight as a drum!! Also, keep in mind that on a carpet tack frame as you work your cloth can start to sag and will need to be re-stretched as you work.

Don't overwork an area. The cloth is only so strong so if you spend too much time tufting in one area it will break down. This is also why we suggest to do small areas first.

Make sure you are moving the machine in the right direction. Always tuft upwards or toward the closed side of the needle!

Until you have a feel for the gun avoid doing curves as this can chew up the cloth if done incorrectly. Curves and shapes can easily be made with horizontal or vertical lines. If you have tried all the above and you are still having trouble check the foot placement on our gun. sometimes moving it forwards or back just a smidge can make all the difference in the world! - This can particularly happen if you have tried to alter the pile height of your gun.

If you have tried all the above, then feel free to contact me at hello@allthingseffy.com for more help

Once your have an area that is ripped - STOP TUFTING IN THAT AREA

Finish the rest of the piece and then create a small patch on a different section of the cloth. This patch can then be sewn in or glued in.

Another option if the hole is small enough is to take a curved needle and a string of your tufting cloth. Sew the hole up gently and tuft gently as much as you can around the hole.

Here are some reasons why this might be happening:

You aren't pushing hard enough! - Tufting guns can definitely be daunting when you first start and beginners can often feel quite tentative.

You need to push firmly into the cloth and ensure the foot is always in contact with the cloth. If you are using the right cloth you can apply a lot of pressure to the fabric and cloth! and I mean a lot!

Make sure you are tufting in the right direction! - Always tuft up or in the direction of the closed side of the needle.

You are using inferior fabrics - using the right cloth can solve a lot of problems! 

Make sure your cloth is stretch as tight as possible and remember to re-stretch your cloth as you tuft! It will loosen as you work on the fabric.

To avoid having to re-thread your tufting gun:

Check that nothing is interfering with the smooth flow of yarn/wool from cone to gun.

Is the cord of the gun getting in the way of the yarn/wool?

Has the cone fallen over? Or are you using a skein and it keeps getting caught? Make sure the source of the yarn/wool is free for a smooth consistent flow. We recommend a cone or a cake on a Spinning Yarn Holder

Is the yarn/wool tangled at the eyelet on the frame?

If all the above issues have been sorted then it may be that your yarn/wool is too thin and falls out because there is not enough weight.

We recommend two strands of our Romney 8ply.

A little trick to avoid having to re-thread your gun a lot is to pause before you pull your gun out of the fabric. Pull the gun out slowly and catch the ends of the yarn with your fingers. This keeps the yarn from slipping out and needing to re-thread! Also once you have grasped the ends give a little tug on the yarn coming from the cones to ensure nothing is stuck. I'll provide a video link for this soon!

Got a question we didn’t answer?

Ask us all your arts and crafts related questions, we love yarning to you about our passion for anything creative.

Net Orders Checkout

Item Price Qty Total
Subtotal $0.00
Shipping
Total

Shipping Address

Shipping Methods